Excel already has a built-in function to perform a spelling check on the active worksheet. But there is a 5% chance of you checking them out. This is because you don’t type long paragraphs or essays in Excel.
One of the major differences between Microsoft Excel and MS Word is that if you type in an incorrect word in Excel, you won’t notice the red wavy line underneath that word. So, it’s easy to forget about the spellings completely.
So stick with me, As I will guide you through the best possible ways to spell check multiple sheets or all the sheets in the workbook. So, stay along.
Shortcut Key for Spelling Check in Excel
F7 is the keyboard shortcut key for spelling and grammar check in Excel’s Windows and Web Version. For MacOS, select the A1 cell and press the fn key + F7 key altogether. This will open up a dialog box and you can correct the spellings as per the suggestions.
There are several keyboard shortcuts and to learn every one of them is like having a word on the tip of your tongue, and you can’t remember it. That’s why you need to learn some alternative methods as well.
Remember – ‘No matter how much hard work you put on Data Entry, all your credit will go into vain if you ignored a disastrous glaring error of your worksheet.’
How To Check Spelling in Microsoft Excel
Suppose you are an HR manager at a company and your primary task is creating a spreadsheet that contains all the Employees’ information. The spreadsheet includes each employee’s name, Job title, department, and contact information.
A word of praise is equal to ointment on a sore. So, you’ve been working on it for hours and you’re almost done, but you want to make sure that everything is picture perfect before you send it to your boss. That’s where you decide to run the spell check in Excel to catch any spelling mistakes.
Here’s how to perform a spell check in Excel:
Method 1: Use the Review Tab to Check Spelling on a Worksheet
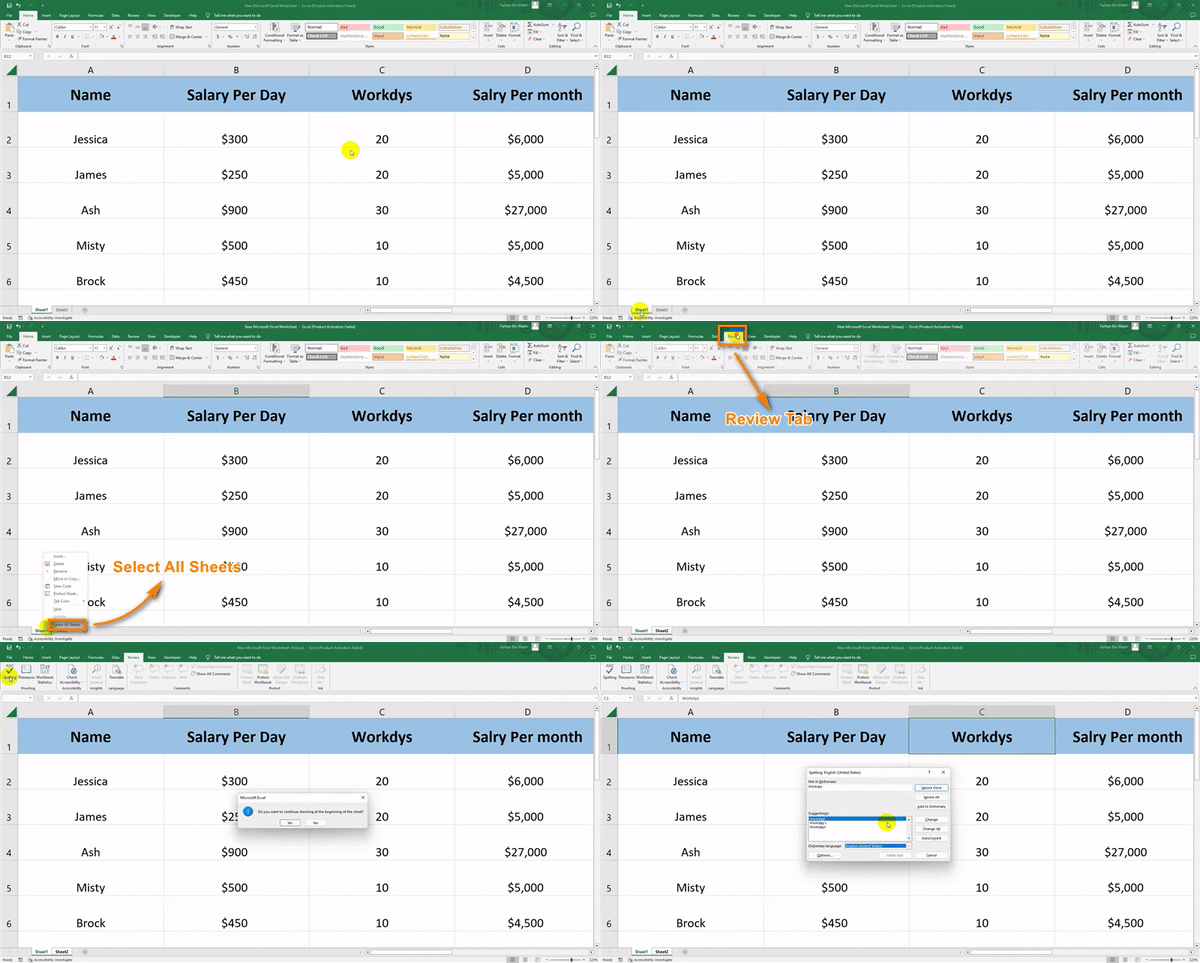
You can use the review tab to check grammatically misspelled texts on a single cell, multiple cells, an entire worksheet, and multiple worksheets. Follow the process below:
- Open the Excel Spreadsheet you want to check the spellings for.
- Click on the Review Tab then select the Spelling Function.
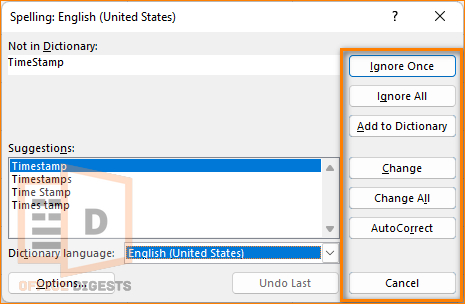
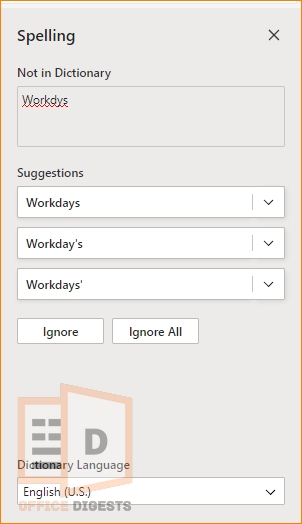
A dialog box will open up, showing the following options:
Suggestions: Excel will suggest words that were pre-added in its dictionary. Choose any of the suggested terms based on your scenario.
Ignore Once: This option allows you to ignore the suggested terms once. Excel will move on to the next cell and review the spellings.
Ignore All: This option allows you to ignore all the suggested terms. It’s similar to not checking the document at all.
Add: Excel has some pre-added terms in its dictionary. If for any means you want to add some words in its thesaurus, you can do so by using this option.
Change: This option allows you to change the misspelled word of the active cell into the first suggested term.
Change All: Excel shows multiple suggested terms for a single word. Changing all at once will allow only the first suggested terms to be replaced by the misspelled word.
Auto-correct: Although Excel has the auto-correct option, it doesn’t work as per expectations. It only allows the replacement of the active suggested term (no matter what the context is).
Auto Spell Check in Excel For Multiple Worksheets
The process is similar to the previous one. The tweak deals with selecting all the sheets at once. You can right-click on any one of the sheets and select all sheets or you can hold the Ctrl button and select multiple worksheets. Then, go to the Review Tab and press the abc spelling tab.
Method 2: Use the AutoCorrect Option in Excel
The AutoCorrect option in Excel is useful when working with a large dataset of customer names. The names may have been entered by multiple people and may contain typos or inconsistent formatting.
Using the AutoCorrect option, you can set up a list of commonly misspelled or incorrectly formatted names, and Excel will automatically correct them as you type.
This can save a lot of time and prevent errors in the data. For example, you can set “St.” to automatically change into “Street” and “Rd.” to “Road” and so on.
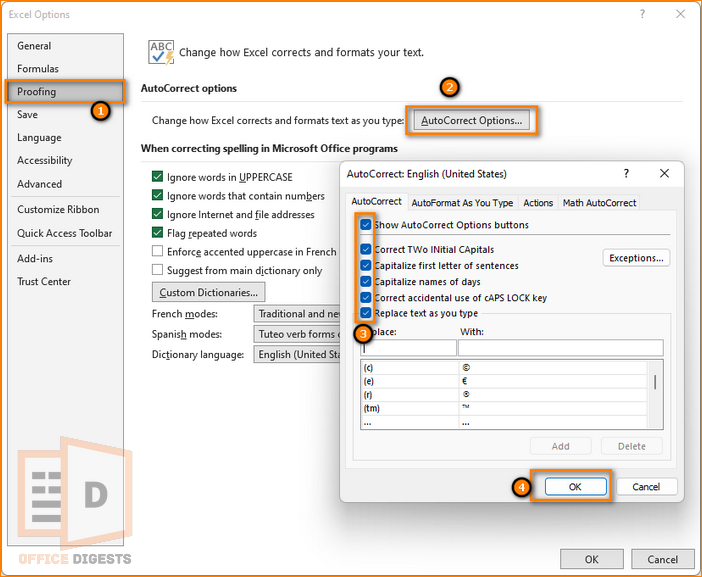
For using the Autocomplete or Autocorrect option, go to Files > Options > Proofing > AutoCorrect Options and checkmark all the boxes. Press OK to complete the procedure.
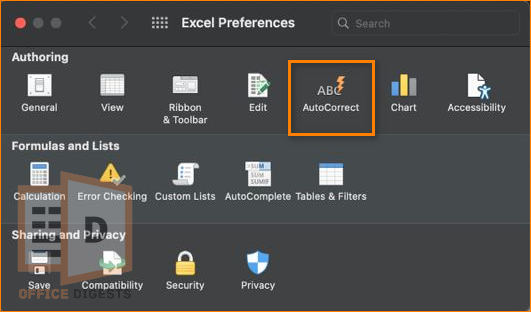
For Mac users, go to Excel > Preferences > AutoCorrect option under the Authoring Section.
Now try misspelling a few words and let Excel correct it for you automatically. Alternatively, you can also use macros to enable spell check. How? Let’s dive in.
Method 3: Apply Excel VBA to Conduct Spelling Check
To enable VBA in Excel, you must enable the Developer tab. I have made a complete tutorial on that topic, do check it out.
Using Excel VBA, you can create a macro that runs a spelling check on the entire document, highlighting any errors and providing suggestions for corrections. This can save a lot of time and effort, as well as ensure that the document is free of errors before it is sent to clients. Additionally, the macro could be programmed to check the spelling of different languages, which can be especially useful if the document is written in multiple languages.
So, here’s how you can enable spell check in excel using VBA:
- Go to the Developer Tab and click on Visual Basic.
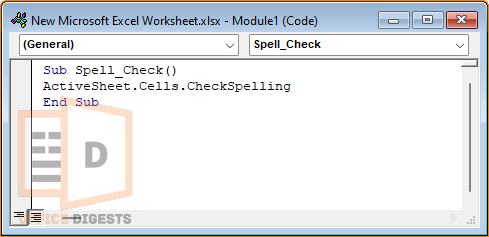
- Insert a new module and paste the following command-
Sub Spell_Check()
ActiveSheet.Cells.CheckSpelling
End Sub
- Save the Module and Press F5 to run the command.
Detailed Explanation of the Code
This code creates a macro called Spell_Check in Excel.
When the macro is run, it performs a spell check on the active sheet using the CheckSpelling method.
The ActiveSheet object refers to the currently active sheet in the Excel workbook. The Cells property refers to all cells in the active sheet. By calling the CheckSpelling method on the Cells property, the macro runs a spell check on all cells in the active sheet.
Now, suppose you want to check spellings every time before closing the workbook. For that, you need to run a different module. Instead of inserting a new module, you have to go to Visual Basic > Double-click on This Workbook and paste the following command-
Private Sub Workbook_BeforeClose(Cancel As Boolean)
Sheet3.Cells.CheckSpelling
End Sub

This code creates an event handler macro in Excel that runs when the workbook is closed.
The Private Sub Workbook_BeforeClose(Cancel As Boolean) line mentioned in this code declares the start of the event handler macro and specifies that it should run when the BeforeClose event of the Workbook object occurs.
The BeforeClose event occurs just before the workbook is closed and the Cancel parameter allows the event to be canceled if necessary.
The Sheet3.Cells.CheckSpelling line specifies that I am commanding to run the spell check on all cells in Sheet3 of the workbook. Here, Sheet3 is the worksheet number where I wanted my spelling check to take place.
When the workbook is closed, this code will check the spelling on all cells of Sheet3, and if there are any spelling errors, it will prompt you to correct them before allowing the workbook to be closed.
Save the command and a dialog box will appear immediately. Replace the suggested words and click OK.
VBA Code For Visible Sheets
With VBA code, you have the flexibility to customize the spell check process to fit your specific needs. For example, you can check the spelling on specific sheets, check only certain types of data, or check the spelling in multiple languages.
Let’s check out the code for checking spelling and grammar for visible sheet:
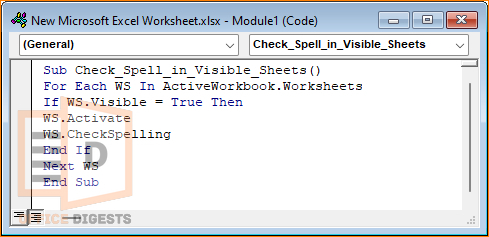
Sub Check_Spell_in_Visible_Sheets()
For Each WS In ActiveWorkbook.Worksheets
If WS.Visible = True Then
WS.Activate
WS.CheckSpelling
End If
Next WS
End Sub
Open the Visual Basic > Insert Module > Paste the Command > Press F5 to Run the command.
Detailed Explanation of the Code
What you are doing is creating a macro called Check_Spell_in_Visible_Sheets in Excel. The Sub Check_Spell_in_Visible_Sheets() line declares the start of the macro.
The For Each WS In ActiveWorkbook.Worksheets line initiates a loop that iterates through all the worksheets in the active workbook. The If WS.Visible = True Then line checks if the current worksheet being looped through is visible. If the current worksheet is visible, then the code inside the If block is executed.
The WS.Activate line makes the current worksheet the active worksheet. Again, the WS.CheckSpelling line checks the spelling on the current worksheet. The End If line ends the If block. The Next WS line goes to the next worksheet in the loop. The End Sub line ends the macro.
VBA Code For Both Visible & Hidden Sheets
Macros can be used to automate repetitive tasks, so instead of manually running a spell check on each sheet, you can use a single macro to check the spelling on all hidden and visible sheets at once.
Paste the following command in the module box of Visual Basic-
Sub SpellCheckAllSheets()
For Each WS In ActiveWorkbook.Worksheets
WS.CheckSpelling
Next WS
End Sub
Code For Highlighting Misspelled Words Flagged With Red
So, you want to know how to improve the overall accuracy and readability of the data, making it more reliable for analysis and reporting?
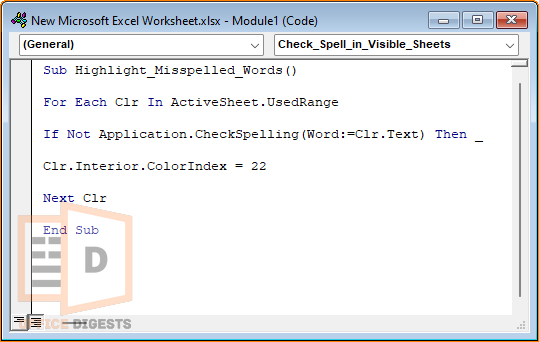
Then you should definitely copy the code of this section because by default Excel doesn’t show any wavy red line under a misspelled word. Insert a Module and Paste the following command-
Sub Highlight_Misspelled_Words()
For Each Clr In ActiveSheet.UsedRange
If Not Application.CheckSpelling(Word:=Clr.Text) Then _
Clr.Interior.ColorIndex = 22
Next Clr
End Sub
Explanation of the Code
My job is to elevate your Excel skills to a next level in an easy way. The Code mentioned here is a simple macro used to highlight misspelled texts in Excel. What you are doing is-
Sub Highlight_Misspelled_Words() – This line declares the start of the macro, and assigns a name to it.
For Each Clr In ActiveSheet.UsedRange – This line initiates a loop that will run through all the cells in the active sheet’s used range. The variable Clr is used to represent the current cell being looked at in each iteration of the loop.
If Not Application.CheckSpelling(Word:=Clr.Text) Then – This line uses the CheckSpelling function from the Application object to check the spelling of the text in the current cell (represented by Clr.Text). If the spelling is incorrect, it will execute the code inside the if statement.
Clr.Interior.ColorIndex = 22 – This line changes the interior color of the current cell to the color with the index of 22. This color corresponds to red.
Next Clr – This line moves to the next cell in the loop.
End Sub – This line marks the end of the macro.
The macro will loop through all the cells in the used range of the active sheet, checking the spelling of the text in each cell. If a word is misspelled, the cell’s interior color will be set to red.
How To Spell Check Formulas in Excel
Till now, I explained how to check spellings for an active spreadsheet. But, I didn’t explain about the process of proofing the text of formulas. Normally, formulas don’t have misspelled functions. It’s just you typed some wrong text into it.
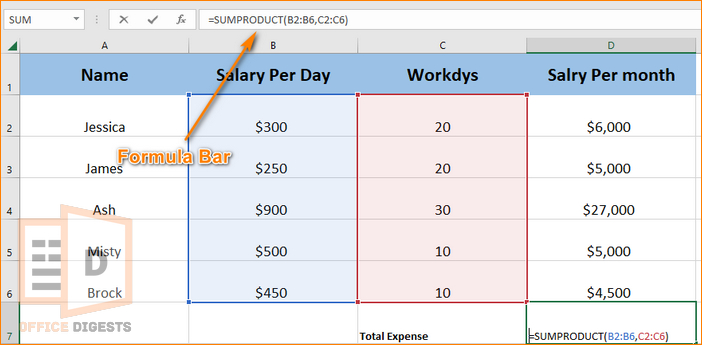
To check the spelling of a formula, select the cell that contains the formula, click on the formula bar. Then go to the Review Tab and click on Spelling. Correct the word that is incorrect.
Final Words
It is easy to forget about checking for errors in Excel as there aren’t any visual indicators as compared to Word or PowerPoint. Not only the orthography but also the autocorrect feature don’t function as smoothly as MS Word.
By going through all our detailed processes, you can now easily check for mistakes and provide a clean workbook to your client.

