As a professional, time is my most valuable asset. Any method of streamlining my workflow is worth its weight in gold.
One method to accomplish this is to learn how to print to PDF in Excel using VBA.
Printing using codes may sound daunting at first, but with a few simple steps, you can master the process and save time in your day.
Keep Reading, As in this post, I’m about to show you how you can save Excel files as a pdf format.
So, let’s get started.
Understanding the Basics of VBA
Before diving into the specifics of printing to PDF in Excel with VBA, it’s important to have a basic understanding of what VBA is, how to enable VBA, and how it works.
VBA, or Visual Basic for Applications, is a programming language that allows you to automate repetitive tasks in Microsoft Office applications. This includes Excel, Word, and PowerPoint, among others.
VBA code is written in modules, which are essentially just a set of instructions that tell Excel what to do. These modules can be created and edited in the Visual Basic Editor, which can be accessed by pressing Alt+F11 on your keyboard.
How To Print To Pdf in Excel
Now that you know a few things about VBA, you are now ready to save the file as pdf using VBA Codes.
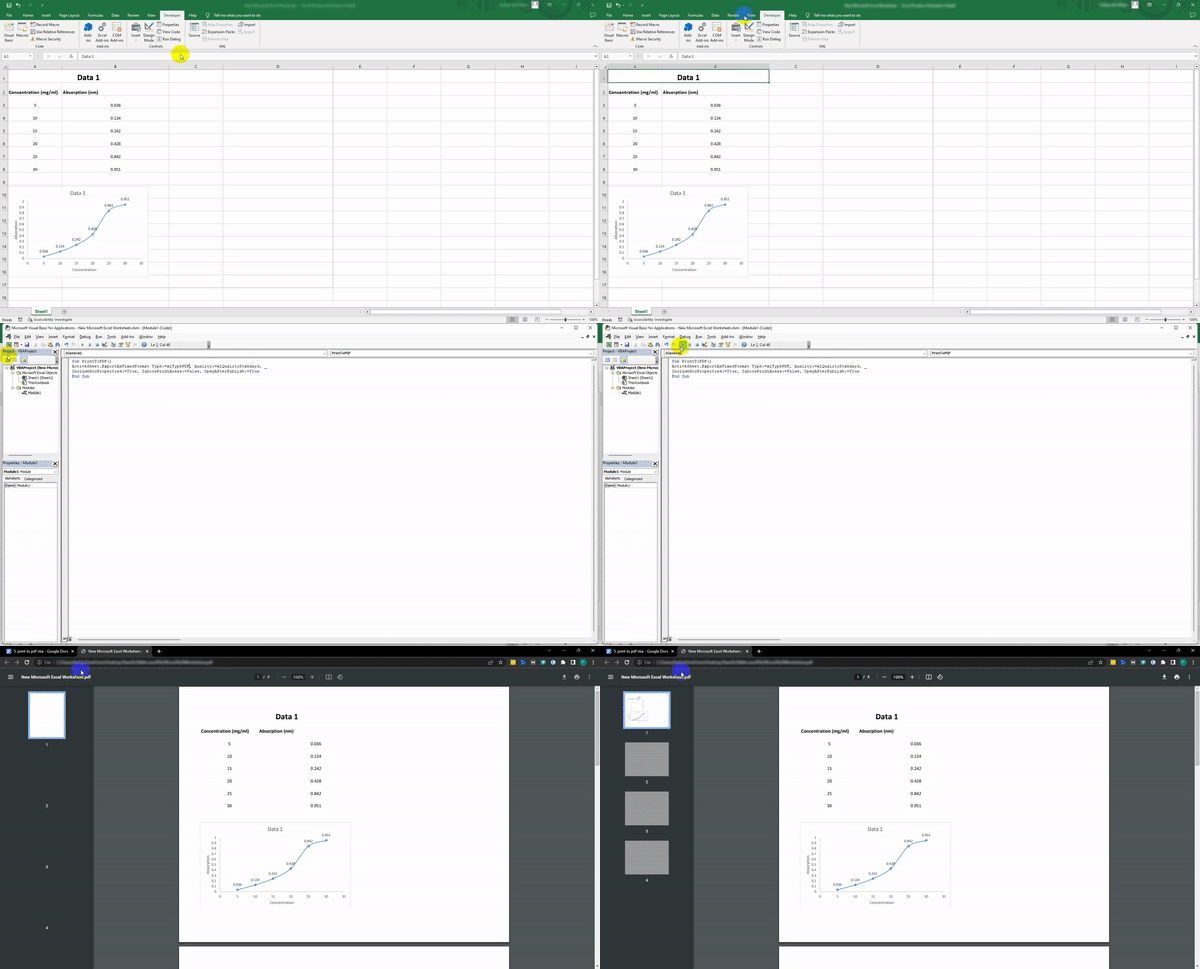
Here are the steps to print to pdf in Excel:
1. Set Up Your Workbook
The first step in printing to PDF with macros is to make sure your workbook is set up correctly. This means that all the data you want to print is available in one or more worksheets.
To make sure your workbook is ready to print to PDF, follow these steps:
- Ensure all data is contained within one or more worksheets.
- Apply any necessary formatting to the data, such as font size and style, color, or borders.
- Set up the page layout, including margins, orientation, and paper size.
2. Write the VBA Code
VBA is like having a personal assistant for your Excel tasks. The next step in printing to PDF in Excel with VBA is to write the code that will perform the task.
Here’s an example of what the code might look like:
Sub PrintToPDF()
ActiveSheet.ExportAsFixedFormat Type:=xlTypePDF, Quality:=xlQualityStandard, _
IncludeDocProperties:=True, IgnorePrintAreas:=False, OpenAfterPublish:=True
End Sub
Let’s break down what each line of this code means.
Explanation:
The first line, “Sub PrintToPDF()“, is simply the name of the macro. You can name it whatever you like.
The second line, “ActiveSheet.ExportAsFixedFormat“, is the command that actually prints the worksheet to PDF.
The third line, “Type:=xlTypePDF“, specifies that the output format should be PDF.
The fourth line, “Quality:=xlQualityStandard“, specifies the quality level of the output PDF. You can choose from xlQualityStandard, xlQualityMinimum, or xlQualityMaximum.
The sixth line, “IncludeDocProperties:=True“, specifies whether or not to include document properties in the output PDF.
The seventh line, “IgnorePrintAreas:=False“, specifies whether or not to ignore print areas when printing to PDF.
The eighth line, “OpenAfterPublish:=True“, specifies whether or not to open the output PDF file after the printing process is complete.
Once you’ve copied and pasted the code, save the workbook by clicking File > Save in the Visual Basic Editor. You can then run the macro by clicking the “Run” button or by pressing F5 on your keyboard.
3. Add a Button to Your Worksheet
In one of my posts, I taught the ways of adding checkboxes in Excel. The process was straightforward and requires zero professionalism. Similarly, you can add a button to your worksheet.
Here’s how to do it:
- Click the Developer tab in the Excel ribbon. If you don’t see the Developer tab, click File > Options > Customize Ribbon, and then select the Developer check box under Main Tabs.
- Click the Insert button in the Controls group, and then select the Button control under Form Controls.
- Place the button on your worksheet in an active cell.
- Right-click the button and select “Assign Macro“.
- Select the macro you created from the list, and then click OK.
Now, whenever you click the button, the macro will run and print the worksheet to PDF.
Troubleshooting Common Issues
Like any programming task, there are bound to be issues that arise along the way.
Here are some common problems you may encounter when printing a PDF file in Excel:
The output PDF file doesn’t look like the worksheet
This may be caused by differences in page setup between the worksheet and the PDF. Make sure the margins, orientation, and paper size are set up correctly for both the worksheet and the PDF.
The PDF file is too large
This problem is caused due to insertion of unnecessary document properties or using a high-quality setting. Try turning off document properties or reducing the quality level to see if that helps.
The macro doesn’t run
Make sure the macro is saved in the correct workbook and is enabled. Also, check the syntax of the code to make sure there are no errors.
The Benefits of Printing to PDF with VBA
You may be wondering what the benefits are. Here are just a few:
- Save time
By automating the printing process, you can save time and focus on other tasks.
- Increase accuracy
Printing to PDF with VBA ensures that the output file looks exactly like the worksheet, without any manual adjustments.
- Reduce paper usage
Printing to PDF eliminates the need for physical copies, reducing paper usage and saving money on printing costs.
- Easy sharing
PDF files can be easily shared via email or online, making it simple to distribute information to others.
Final Words
Printing in PDF format in Excel may seem difficult, but with a little practice, it can become a valuable tool in your workflow. If you follow the steps mentioned in this post, you can create a simple macro. After that, it’s a matter of a single click.
