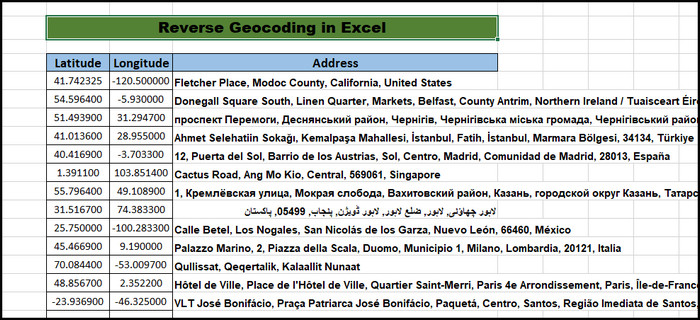
Microsoft Excel is helpful in formatting and performing complex calculations effortlessly. Reverse Geocoding is one such feature that many find handy.
You can use Excel to convert longitude & latitude coordinates into addresses.
Here, I will show you the step-by-step process for reverse geocoding in Microsoft Excel using VBA.
Let’s dive in.
Get Hands-On: Download the Practice Workbook and Work Along with the Steps
You can click below to download the practice workbook and follow along with the step-by-step instructions.
Reverse Geocoding in Excel.xlsmWhat is Reverse Geocoding?
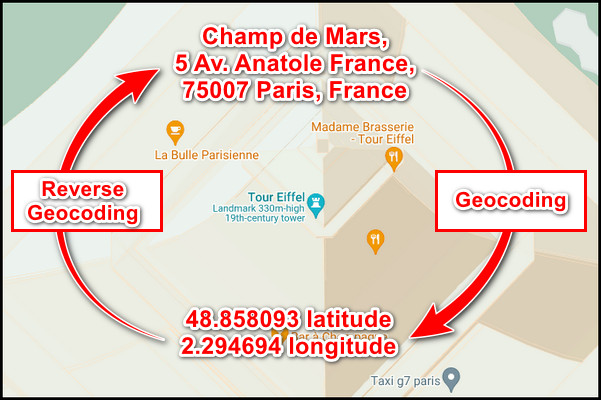
Every location has latitude & longitude coordinates value, and Reverse Geocoding is the technique to decode that number into an actual address.
Reverse Geocoding converts the latitude & longitude values and returns a human-readable address. If the address has no name, it provides a location based on a nearby landmark or street address. It’s just the opposite process of address geocoding.
The latitude & longitude values are great for maps, but a driver or EMS (Emergency Medical Service) often needs more context to reach the right destination. For this reason, reverse geocoding is crucial.
How to Perform Reverse Geocode in Microsoft Excel
You must use a VBA (Visual Basic for Applications) script in Microsoft Excel to decode the latitude & longitude. This VBA code will act as a custom function to reverse geographic coordinates to addresses in Excel, as there is no default function formula for reverse geocoding.
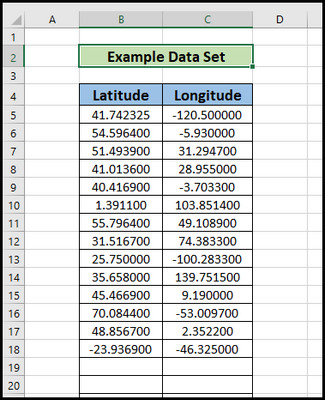
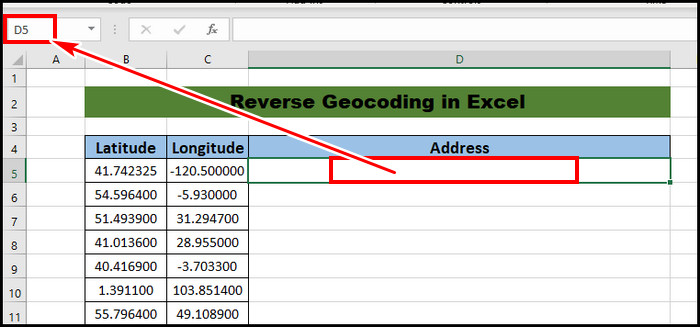
I will use the datasheet below with geolocation values for this tutorial guide.
Here are the steps to perform reverse geocoding in MS Excel:
1. Enable Macros in Excel
By default, macros are disabled in Excel due to security purposes. So, we have to enable the feature to begin with.
To enable macros in Excel:
- Open the Excel sheet that contains the latitude & longitude values.
- Go to the File tab and select Options.
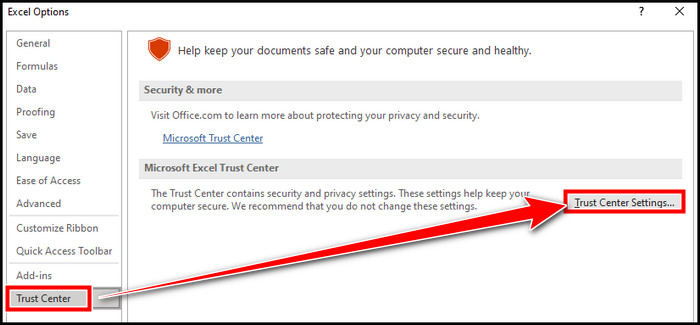
- Select Trust Center and then Trust Center Settings.
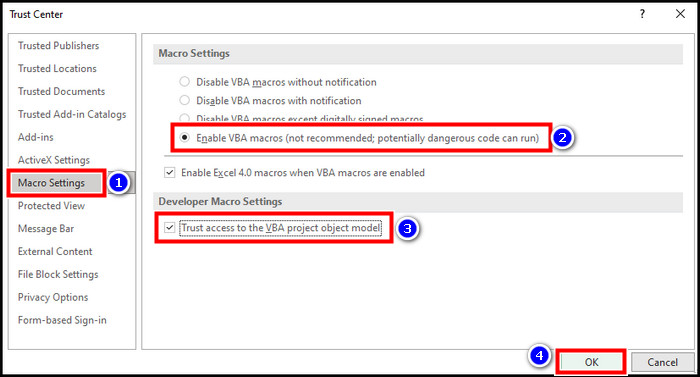
- Choose Macro Settings, turn on Enable all macros, and check Trust Access to the VBA project.
Now, we have to add the VBA script. Keep reading.
2. Prepare Reverse Geocode Excel Add-in
You will require the Developer tab in Excel to add the VBA script. However, by default, it is hidden in Microsoft Excel.
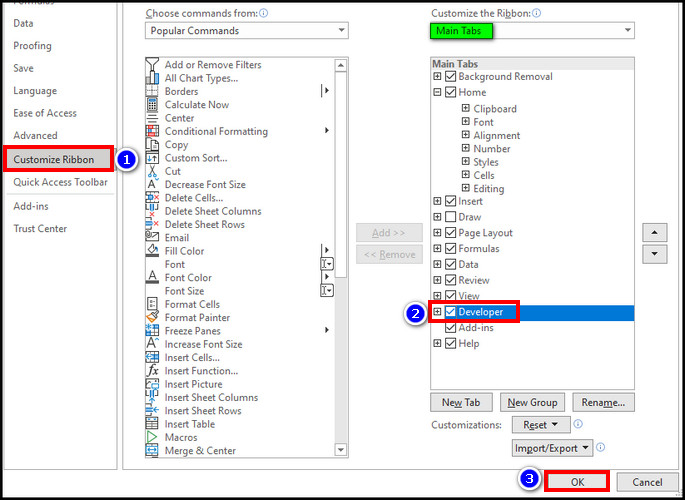
To enable the Developer tab, go to File > Options > Customize Ribbon and tick Developer from the Main tabs on the right. Hit OK to save, and the Developer tab will appear in the Excel.
Follow the process below to add the VBA script to use Reverse Geocode in Excel:
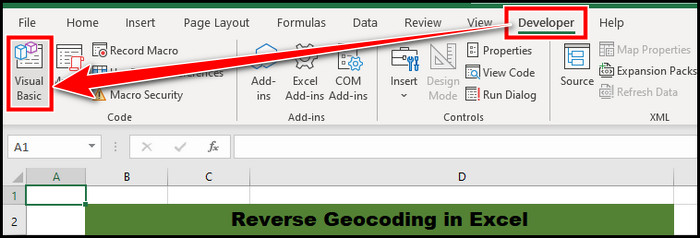
- Go to the Developer tab and click on Visual Basic.
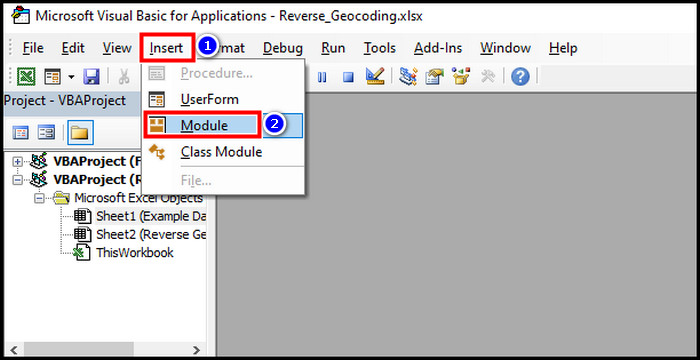
- Select Insert Tab and then Module.
- Copy-paste the script on the right side.
Option Explicit
Function ReverseGeocoder(lati As Double, longi As Double) As String
    On Error GoTo ErrorHandler
    Dim xD As New MSXML2.DOMDocument
    Dim URL As String
    xD.async = False
    URL = "https://nominatim.openstreetmap.org/reverse?lat=" & CStr(lati) & _
          "&lon=" & CStr(longi)
    xD.Load URL
    If xD.parseError.ErrorCode <> 0 Then
        HandleError xD.parseError.reason
    Else
        xD.SetProperty "SelectionLanguage", "XPath"
        Dim loca As MSXML2.IXMLDOMElement
        Set loca = xD.SelectSingleNode("/reversegeocode/result")
        If loca Is Nothing Then
            HandleError xD.XML
        Else
            Application.Caller.Font.ColorIndex = vbOK
            ReverseGeocoder = loca.Text
        End If
    End If
    Exit Function
ErrorHandler:
    HandleError Err.Description
End Function
Sub HandleError(errorMessage As String)
    Application.Caller.Font.ColorIndex = vbErr
    ReverseGeocoder = errorMessage
End Sub
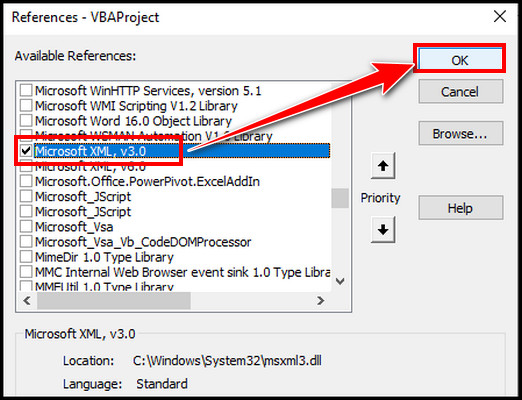
- Click on the Tools tab and then References. tools-references
- Scroll down, tick the box Microsoft XML v3.0, and hit OK.
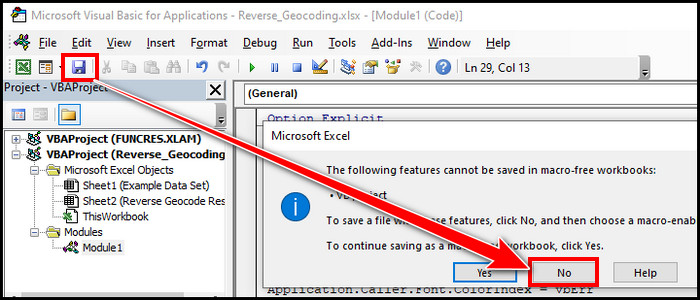
- Click on the Save icon and select No.
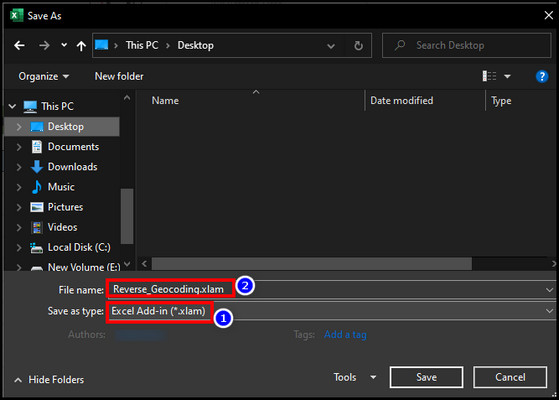
- Select a location & name, and save it as .xlam file type.
Now, you have to use the add-in to use Reverse Geocode in Excel.
3. Use Reverse Geocode Add-in in Excel
You have to add the newly created add-in in the Excel file. So we can use the custom function.
To use the reverse geocode add-in in Excel:
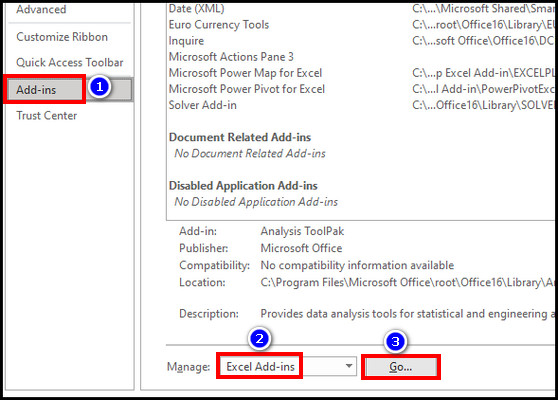
- Open Excel Options and select Add-ins.
- Choose Excel Add-ins from the Manage drop-down and hit Go.
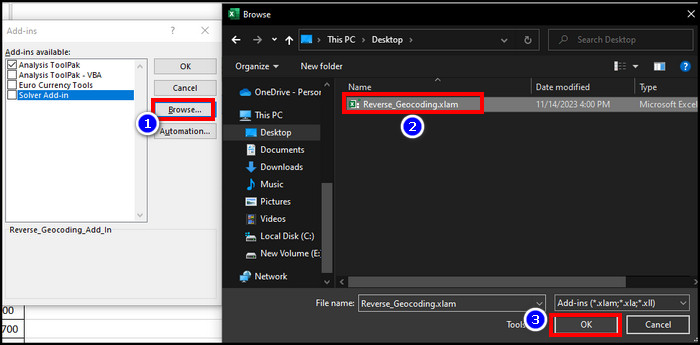
- Select Browse and select the .xlam file that you saved.
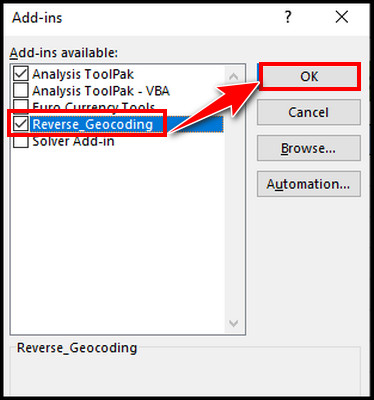
- Ensure the new add-in is ticked and hit OK.
- Create a new column for Address and select the first blank cell. For our practice book, it is the D5 cell.
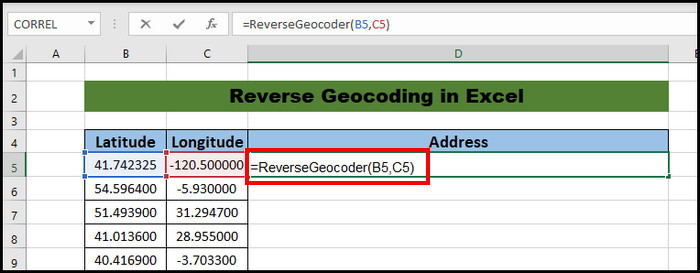
- Type =ReverseGeocoder(B5,C5) as B5 and C5 is our first latitude and longitude cell, respectively.
- Hit Enter.
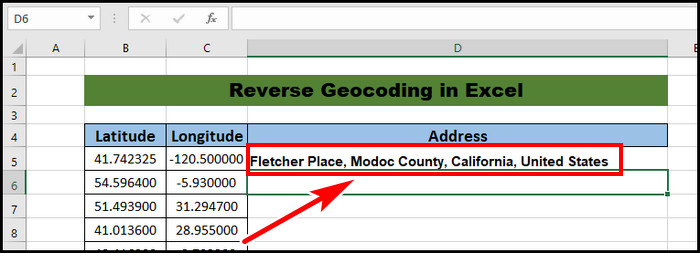
You will see that the cell is filled in with the corresponding address according to that longitude and latitude value.
As there are other entries, use the Excel drag feature to apply the same function to the rest of the cells. If you don’t know how to use the drag feature, select a cell > click on the bottom right of the cell and drag it to the last entry.
During saving the Excel worksheet, you have to save it as .xlsm file type as it has macro enabled.
Note: Generating the address for the rest of the cells will take a while if it’s a long list. The app may seem not responding, but it’s working in the background. So, wait until the process is finished.
Final Words
Getting accurate address names using longitude and latitude values in Excel is easy when using the reverse geocoding function. You have to use a VBA script, which I described in this article.


