Imagine you are a financial analyst and you have received a large spreadsheet with customer sales data. The data includes the sales amount, which is currently in text format, making it difficult for you to perform any meaningful analysis.
You need to convert the text data into numerical values so you can perform calculations, create charts, and analyze trends.
In this situation, converting text to numbers in Excel can be a time-consuming and tedious process, but not anymore with VBA.
By using a simple VBA code, you can quickly change text data into numerical values, saving both time and effort.
Keep Reading, As I’m about to walk you through the way of using VBA to convert text to numbers, making your data entry and analysis faster and more efficient.
How To Identify Numbers That Are Formatted As Text
As I mentioned earlier, the large spreadsheet given to you contained the sales amount in text format. Now, this doesn’t mean they wrote the number 99 as ninety-nine. Excel is smart enough to understand the difference between 99 and ninety-nine. Then why are numbers formatted as text?
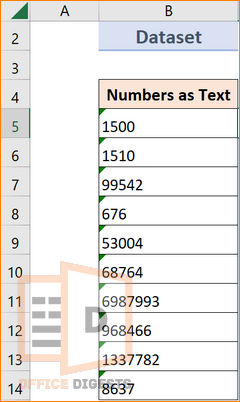
This is because of some misuse and misinterpretations of the dataset. See the example in the image.
Although you see numbers in that column,
The first sign to understand whether the number strings are formatted as text or not is the alignment of the data.
Whenever you enter any text in Excel, it automatically aligns to the left. Now try entering a number. The data aligned to the right.
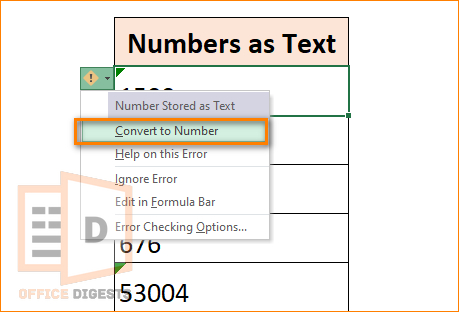
The second sign to understand whether the number is a text or not is the green border at the top left of the cell. Hover over the cell and an important icon will pop up. Click on the icon. The information says – ‘Number stored as text’. Follow the next section to convert text into numbers in Excel.
Convert Text to Number In Excel Using VBA – 3 Different Codes
Although you can convert numbers to text in excel without vba, it is a tedious task if you have a large dataset.
Remember the yellow icon I told earlier? Click on that, and there will be an option called Convert To Number. Click on that and you are great to go. If you have a small dataset, I don’t recommend using VBA codes as they are difficult to find if you are a beginner.
Now, let’s move on to the three codes-
Code 1: Use the Range.NumberFormat Method
First step you need to perform is to enable VBA in Excel. For that you have to enable the Developer Tab.
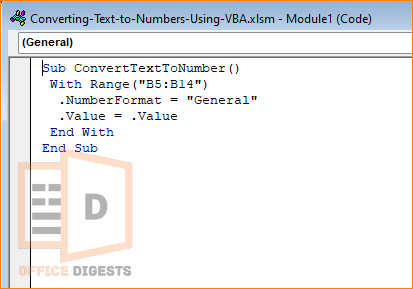
Then go to the Visual Basic Option and Insert a Module. Alternatively, you can use the Alt+F11 keys together to open the VB Editor. Paste the following command-
Sub ConvertTextToNumber()
With Range("B5:B14")
.NumberFormat = "General"
.Value = .Value
End With
End Sub
Save the command and then Run it using F5. All your text strings will be now in number format.
If you want to learn the detailed explanation on what you just actually commanded Excel then follow along.
Let’s break down the code to understand it better:
Sub ConvertTextToNumber(): You are creating a line that defines the start of the macro and the name of the macro, ConvertTextToNumber. This name can be anything you want.
With Range(“B5:B14”): You are defining a range of cells, B5:B14 using this line. No doubt, you don’t want any normal text like Salary Data to be in number format.
.NumberFormat = “General”: This line sets the number format of the defined range to “General”. The “General” number format is a general-purpose number format that automatically changes to reflect the type of data that is entered in the cell.
.Value = .Value: This line sets the value of the cells in the defined range to their current value. This line of code essentially forces the conversion of the text to numbers.
End With: This line ends the definition of the range. It’s a common line almost used in every macro.
End Sub: This line marks the end of the macro. Another common line to end the code.
You can use another code using the Loop Function. Below is the detailed procedure.
Code 2: Add the Loop and CSng Function To the Code
Here, I will be using Loop and Csng functions. The major advantage of using these functions is to convert cells in a sheet to single precision floating-point numbers. The Loop function deals with iterating through each cell in a range and performing the same operation on each cell. On the contrary, the CSng function deals with converting the text into number.
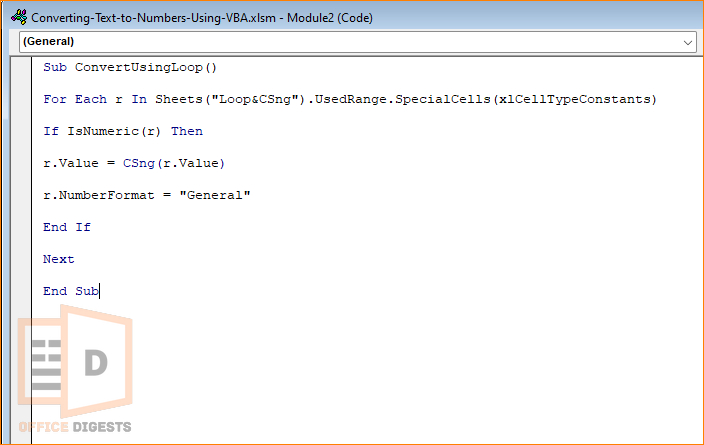
Open the Developer Tab > Visual Basic > Insert Module > Paste the following command > Run the Command.
Sub ConvertUsingLoop()
For Each r In Sheets("Loop&CSng").UsedRange.SpecialCells(xlCellTypeConstants)
If IsNumeric(r) Then
r.Value = CSng(r.Value)
r.NumberFormat = "General"
End If
Next
End Sub
So, what you are declaring here in the macro is in the Subroutine declaration: The first line Sub ConvertUsingLoop() declares the start of a new subroutine or macro in VBA, named ConvertUsingLoop. You can change the name to anything else if you want.
The next line you are using a Loop function For Each r In Sheets(“Loop&CSng”).UsedRange.SpecialCells(xlCellTypeConstants) that is commanding Excel to start a For Each loop in VBA. The loop will iterate through each cell in the used range of the sheet named Loop&CSng that contains a constant value.
Here, the current cell in the iteration is referred to as “r”.
Then, you have to check whether the cell contains a text or a number. For that you will be numerically checking the data.
Numeric Check: The next line If IsNumeric(r) Then checks if the current cell in the iteration, “r”, contains a numeric value using the “IsNumeric” function in VBA. If it does, the code inside the “If” block will be executed.
After the if block executes, the next line will help in format conversion.
Conversion to Single Precision Floating-Point Number: The next line “r.Value = CSng(r.Value)” converts the value of the current cell, “r”, to a single precision floating-point number using the “CSng” function in VBA. Now, you are selecting the number format you desire.
Number Format: The next line “r.NumberFormat = “General”” sets the number format of the current cell, “r”, to “General”. This will display the number in its simplest form, without any additional formatting such as currency or percent signs.
End of If Block: The next line “End If” ends the “If” block, which was started on line 4.
Next Statement: The line “Next” moves on to the next cell in the iteration, starting from line 2 again until all cells in the used range have been processed.
End of Subroutine: The final line “End Sub” ends the subroutine or macro, which was declared on line 1.
Now, the final condition, that is the final code of this topic. What if you have a huge dataset where you know the starting cell, but don’t know the ending cell. That’s where you can’t define a range of cells. You need a Dynamic Code.
Code 3: Convert Text To numbers For Dynamic Range
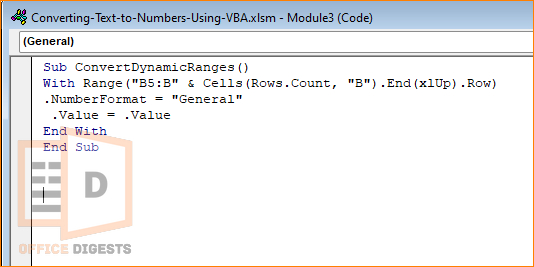
The code required in this situation is-
Sub ConvertDynamicRanges()
With Range("B5:B" & Cells(Rows.Count, "B").End(xlUp).Row)
.NumberFormat = "General"
.Value = .Value
End With
End Sub
By following the exact same methods above, you have to paste the command. But, do note that I am using cell B here as my range. You can change the cell range depending on your dataset.
Final Words
Although VBA codes are tough to learn, I have explained the process in this case very deeply. Now, you can use the codes to simplify your Sales data task as mentioned in the introduction. You can practice using your own dataset. The next time you ever face such an issue, I am sure you will be a professional in Excel.

